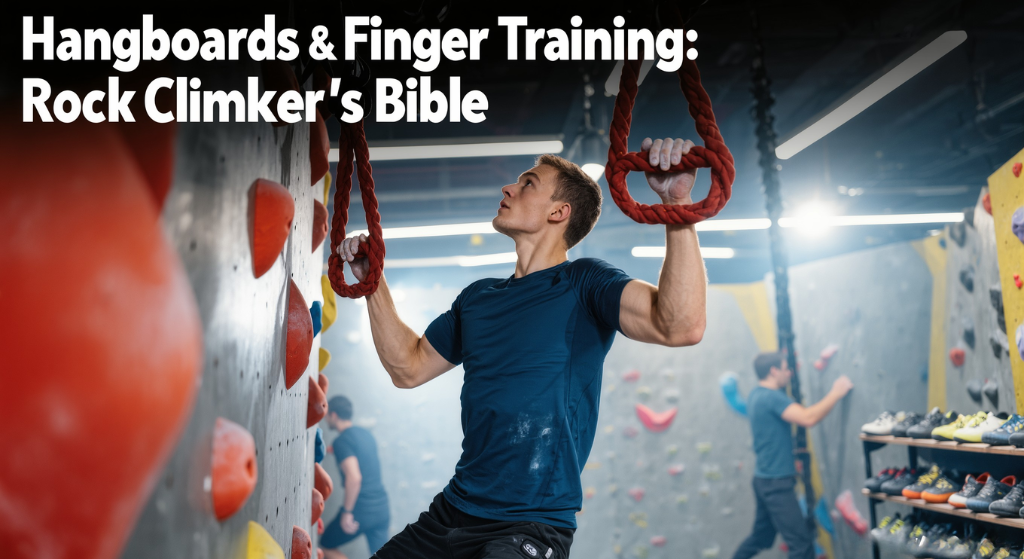
Hangboards & Finger Training: The Rock Climber’s Bible
Finger strength is the single greatest determinant of climbing performance above beginner level — and the hangboard is the most efficient tool ever developed to build it. This guide covers every variable you need to know: the six grip positions, the five core training protocols, how to structure sessions for your level, and which boards on Amazon are actually worth buying. Whether you’re pulling on 20mm edges or trying to survive your first repeater session, this is the complete reference.
⚡ Before You HangHangboard training is not for beginners. If you’ve been climbing fewer than 12–18 months, your tendons have not had time to adapt to climbing loads — hangboarding before this window is the leading cause of pulley injuries in new climbers. Once you’re ready: the half-crimp on a 20mm edge is the gold standard training position, 7/3 repeaters (7 sec hang, 3 sec rest × 6 reps) are the most proven protocol for intermediate climbers, and wood boards are kinder to skin than plastic for high-volume sessions. Start with a 30mm edge. Progress to 20mm. Only add weight when 20mm bodyweight hangs are easy.
Climbing is a fingertip sport. At grades below 5.10 (V3), technique and body awareness dominate — fingers are rarely the limiting factor. Above that threshold, the equation flips. Finger strength becomes the ceiling through which technique alone cannot break. A climber with exceptional technique but weak fingers will plateau; a climber with average technique but exceptional finger strength will progress rapidly because they can hold positions long enough to learn from them.
The physiology is specific: the flexor tendons and the annular pulleys (A2 and A4 in particular) that route those tendons across your finger joints are the structural load-bearing components of climbing grip. These structures adapt slowly — tendons take 3–6× longer to strengthen than muscles — which is why the first year of climbing should involve nothing more aggressive than on-wall training, and why structured hangboard work demands patience above all else.
What a hangboard does that on-wall training cannot: it allows precise, repeatable, quantifiable loading at a specific edge depth and grip type. You can add or remove weight to the gram. You can track progress across months. You can isolate exactly which grip position is weak and load it specifically. This level of training precision is impossible on a climbing wall and is why hangboarding is the primary strength-development tool of every serious sport climber in the world.
💡
The 18-month rule: Most coaches and sports physiotherapists agree that climbers should not begin structured hangboard training until they have been climbing consistently for 12–18 months. This is not arbitrary — it’s the minimum time required for annular pulleys and flexor tendons to develop baseline load tolerance. Starting earlier dramatically increases pulley injury risk.
The 6 Grip Positions — Mechanics & Training Priority
Understanding grip mechanics is foundational to safe and effective hangboard training. Each position loads the finger structures differently — some are more injury-prone, some are more transferable to climbing performance, and some require specific progression before they can be safely trained with load.
★ Primary Training Position
Half Crimp
The gold standard hangboard position. Fingers at roughly 90° at the first joint, second joint slightly flexed, thumb relaxed or lightly resting on index. Balances load across all finger structures without the extreme stress of a full crimp. Transfers well to real climbing holds. Train this first and most.
Best injury-to-strength ratio of any crimp position
Standard for strength testing (MVC on 20mm edge)
Works A2, A4 pulleys and flexor digitorum profundus
Secondary Position
Open Hand
All fingers relatively straight, only slightly curled over the edge — no locked-down position. Lower injury risk than crimp grips, and trains the same flexors with a different force curve. Many coaches consider open-hand training essential for long-term tendon health, as it distributes load differently.
Preferable for high-volume sessions and warm-up sets
Most transferable to slopers and pocket climbing
Less sport-specific than half-crimp but safer
⚠️ Injury Risk — Train Cautiously
Full Crimp
Fingers fully flexed with thumb locked over index finger. Places extreme load on the A2 pulley — the most commonly injured structure in climbing. Many coaches recommend training full crimp only at sport-specific crux sections, never as a general training position. If your project demands it, progress from half-crimp first.
Highest peak force of any grip position
Highest injury risk — avoid until tendons are conditioned
Do not train full crimp if recovering from pulley injury
Pocket Training
Two-Finger Pockets
Three primary configurations: middle pair (ring + middle — “first team”), inside pair (middle + index — “second team”), and outside pair (ring + pinky). Middle pair is strongest and most trainable. Start with bodyweight only — pocket loading concentrates force on individual finger pulleys and requires a solid baseline before weighted work.
Train all three configurations across a cycle
Start on deep (30–40mm) pockets — progress slowly to shallow
Never train monos (one-finger pockets) without years of conditioning
Supplemental
Sloper
Flat or rounded holds angled away from the hand — requires whole-hand friction and shoulder positioning, not just finger flexion. Slopers test contact strength and antagonist wrist stability rather than pure flexor force. Most hangboards include angled sloper rails (20–35°) on top. Best trained at the end of a session when fingers are warmer.
Critical for granite slab and compression-style bouldering
Train with precision shoulder and wrist position
Lower injury risk — good for active recovery days
Advanced Only
Pinch & Mono
Pinch grips (thumb opposition) develop a distinct force vector that edges and pockets do not train. Monodoigts (one-finger pockets) are an elite benchmark tool — the Beastmaker 2000’s middle mono is a famous test piece — but carry extreme injury risk and should never be trained by climbers below 5.12/V6 with years of conditioning.
Pinch training via blocks or board pinches is safe at any level
Mono training: 5+ years of climbing and hangboarding minimum
Transfers to sharp monos and overhang pocket sequences
Hangboard Types Explained — Wood vs Plastic vs Portable
Hangboards come in three primary material categories, each with distinct training implications. The choice between them is not purely aesthetic — material directly affects friction, skin wear, edge feel, and which grip positions can be trained most effectively.
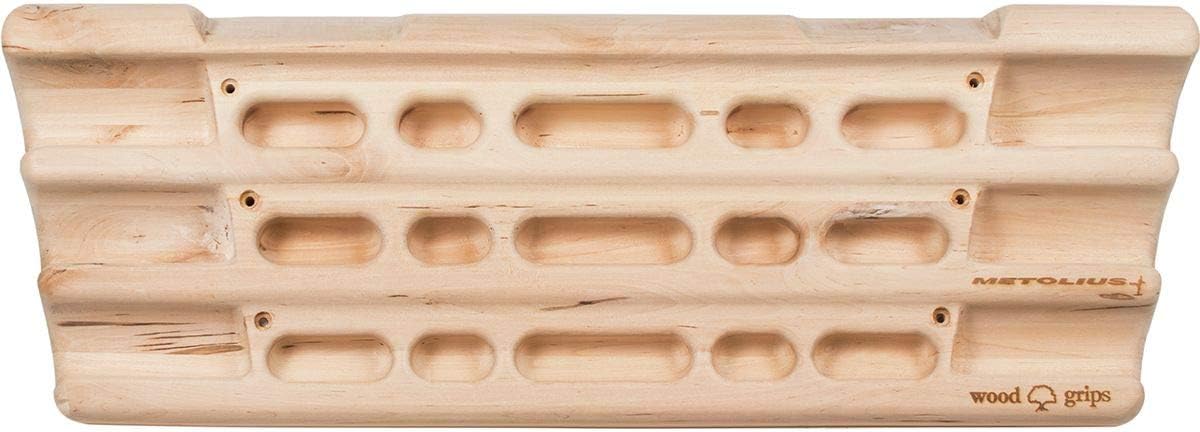
Wooden Hangboards
Wood boards (typically birch, alder, or beech) are the preferred choice of most serious climbers and coaches for good reason. The low-friction surface forces pure finger strength — you cannot compensate with board texture. The smooth, rounded pocket edges are dramatically kinder on skin, allowing longer, more frequent sessions without flappers or raw fingertips. The Metolius Wood Grips line and Beastmaker boards are the canonical examples. The main tradeoff: wood edges are less precise than machined plastic and may not exactly match the 20mm benchmark edges found in climbing gyms.
Plastic / Resin Hangboards
Plastic boards offer greater hold variety, more precise edge depths, and higher friction than wood — making them better suited to sport-specific protocols where exact edge depth matters for tracking progress. The Metolius Simulator 3D and Trango Rock Prodigy Training Center are the dominant options. The texture provides more grip assistance, which means some coaches argue that a 20mm plastic edge requires less pure finger strength than a 20mm wooden edge. For volume training and variety, plastic boards excel; for pure strength development, some prefer wood.
Portable Hangboards
Portable boards hang from a door frame, a pull-up bar, or a sling over any anchor — no wall mounting required. These are critical for travel climbers, apartment dwellers, and anyone who wants a warm-up board at the crag. The tradeoff is edge depth and hold variety — most portable boards offer one or two edge sizes and no slopers. The Tension Flash Board and the Two Stones portable board are popular options in this category. For a full ranking, see Best Portable Fingerboards for Travel Climbers.
📌 How to Choose Your Board Type
Building a home wall setup? Mount a wooden board (Metolius Wood Grips Deluxe II) for volume and skin health, plus a plastic board (Simulator 3D) for variety and progress tracking. Full home wall guide at Best Hangboards for Home Wall Setup.
Travel and crag warm-up? Portable board only — Tension Flash Board or Two Stones for minimal bulk.
First board, single purchase? The Metolius Simulator 3D. World’s best-selling training board for a reason — resin, wide hold variety, beginner-to-advanced progression, includes training guide.
Advanced climber, precision training? Transition to a board with labelled standard edge depths (8–30mm in 5mm increments) so you can track max-hang progress precisely over years.
The 5 Core Training Protocols
The protocol you choose determines whether you’re training strength, endurance, or the hybrid of both that climbing demands. Each has a distinct physiological target, a different optimal place in a training cycle, and a different risk profile. Use this section as a reference — not a menu to sample all at once.
Protocol 1 — 7/3 RepeatersMost Popular
Timing
7 seconds hang, 3 seconds rest — repeat 6× per set (≈ 1 min per set)
Rest
2–3 minutes between sets. Switch grip position between each set.
Volume
3–7 grip positions per session. 1–3 sets per grip. Intermediate–advanced.
Intensity
70–80% of max. Should feel hard but never cause grip failure mid-set.
Target
Strength-endurance hybrid — trains both the alactic and lactic energy systems simultaneously. Best for route climbers.
Best for
Intermediate to advanced climbers. This is the Anderson Brothers protocol, proven across decades of use by climbers up to 5.14+.
Protocol 2 — Max Hangs (7-53)Max Strength
Timing
7 seconds hang, 53 seconds rest per hang — 3 hangs per set = 3 min per set
Rest
3–5 minutes between sets. Maximum 5 sets per session.
Intensity
90–95% of max — near failure at 7 seconds but never quite reaching it. Add weight to achieve this.
Target
Maximum neural recruitment and tendon loading — pure max strength. Developed by Eric Hörst. Minimal pump, high tendon stimulus.
Hang on the smallest edge you can hold for 12–15 seconds before failure. Each session, attempt a slightly smaller edge.
Timing
12 seconds per hang. 2–3 hangs per position. 3–5 min rest between hangs.
Intensity
Close to max — the edge terminates the effort naturally when grip fails around 12–15s.
Target
Strength and neural recruitment. Developed by Eva López. Excellent entry point for climbers new to structured hangboarding.
Best for
Intermediate climbers building a foundation before weighted max hang protocols. No weight required — edge depth provides the progression variable.
Protocol 5 — Weighted Max HangsElite
Method
Use a 14–20mm edge with added weight (weight belt or vest). Load enough that 7-second hang is near-maximal.
Timing
7 seconds per hang. 3 hangs per set. 3–5 min rest between sets. Max 5 sets.
Intensity
90–95% max including added weight. Use a pulley system to remove weight if maximum is too heavy for safe loading.
Target
Peak force production. For climbers who have maxed out minimum-edge progression and need external load to continue overloading.
Best for
Experienced hangboarders (2+ years structured training) climbing 5.12+/V6+. Not for anyone without a solid foundation.
⚠️
Never run two protocols simultaneously. Pick one protocol per training block (4–8 weeks), complete it, rest, then either repeat or progress. Mixing max hangs with high-volume repeaters in the same week is a reliable path to overuse injury. Tendon adaptation requires consistent stimulus, not variety.
Level-by-Level Training Programmes
These structured programmes give you a direct implementation framework for each level. All assume you are also climbing 2–3 days per week — hangboard sessions are supplemental, not a replacement for wall time.
At this stage, the goal is not to maximise finger strength — it’s to develop tendon tolerance without injury. Beginner hangboard training is minimum-edge protocol at very conservative loads, twice per week maximum, on larger holds than feel challenging.
Week 1–2
Warm-Up Hangs Only
30–40mm edges. 5 sec hangs × 3. No fatigue.
Week 3–4
10s Minimum Edge
Find edge you can hold 10–12s. 3 hangs × 2 grips. Full rest.
Week 5–6
Add Third Grip
Half-crimp, open hand, sloper. 3 hangs each. Downsize one grip 3–5mm.
Week 7–8
Deload Week
Reduce volume by 50%. Assess tendon feel. Begin 7/3 if pain-free.
Intermediate7/3 Repeater Programme2–4 years climbing · 5.10–5.12 / V3–V6
This is the level where structured 7/3 repeater training pays the greatest dividends. You should be able to hang a 25mm edge at bodyweight for 10+ seconds before beginning this programme. Progress by reducing edge size (not adding volume) every 4 weeks.
Intermediate Session Template — 2× per Week7/3 Protocol
Warm-Up
10 min on 30mm edge — open hand, submaximal hangs. Shoulder warm-up drills.
Block 1
Half-crimp on 20–25mm. 7/3 × 6 reps. Rest 2 min. Repeat 2 sets.
Block 2
Open hand on 20mm. 7/3 × 6 reps. Rest 2 min. 1–2 sets.
Every 4 weeks, reduce one edge size by 2–3mm OR add one additional set to block 1.
AdvancedMax Hang Programme4+ years structured training · 5.12–5.13 / V6–V9
At this level, 7/3 repeaters on 20mm are relatively easy and progress has slowed. The max hang protocol with added weight on a 14–18mm edge is the next stimulus. This programme requires a training partner or pulley system for safe weight management.
Advanced Session Template — 2× per Week Max7-53 Protocol
Warm-Up
15 min progressive hangs from 30mm → 20mm. Climbing movement warm-up.
Max Hangs
Half-crimp on 14–18mm with +5–20kg added. 7s hang, 53s rest × 3 = 1 set. Rest 5 min. 3–4 sets.
Pockets
Two-finger middle pair on 20mm pocket. 7s × 3 sets. Full rest. Bodyweight or slight assist.
Repeaters
Finish with 7/3 on 20mm open hand — 2 sets as accessory endurance work.
Frequency
Never more than 2 intense sessions/week. 48–72h minimum between sessions. Deload every 4th week.
Injury Prevention — The Non-Negotiables
Finger injuries are the most common training-related injury in climbing — A2 pulley strains (and ruptures in severe cases) account for the majority. Most are preventable with three simple practices that most injured climbers admit they skipped.
Rule 1
Always Warm Up
10–15 minutes of progressive submaximal hangs before any intense work. Start on the largest edges. Work through medium holds. Only then load smaller edges or add weight. Tendons are vascular — they warm up more slowly than muscles, and cold tendons under load are how pulleys rupture.
5 × 10s on 30–40mm holds at 40% effort
5 × 10s on 25mm at 60% effort
3 × 7s on working edge at 80% — then begin session
Rule 2
Respect Recovery Windows
Minimum 48 hours between intense finger sessions. Tendon tissue remodelling after loading takes 48–72 hours — loading before this window is complete means each session starts from a depleted baseline. The climbers who progress fastest are not those who train most; they are those who recover most completely between sessions.
Maximum 2 intense hangboard sessions per week
Deload every 4th week — halve volume, no intensity increase
Take 1–2 weeks complete rest every 3–4 months
Rule 3
Train Antagonists
Climbing and hangboarding are pure flexor-dominant training. Without matching extensor work, chronic muscle imbalances develop that increase injury risk at the wrist, elbow, and shoulder. Extensor training takes less than 5 minutes — it’s the most effective injury prevention tool that most climbers skip entirely.
Wrist extensors: 3 × 15 reverse wrist curls
Finger extensors: rubber band extensions, 3 × 20
Rotator cuff: external rotation with light band, 3 × 15
⚠️ Rule 4
Stop at Warning Signs
Pain during or after hanging is a stop signal, not a signal to push through. Pulley injuries often present as a sharp “pop” or a localised ache over the A2 pulley (inside of the proximal knuckle). Training through this signal converts a minor strain into a full rupture that requires 3–6 months off. The 10-second test: if a gentle hang on a large jug causes pain, stop the session.
Sharp pain = stop immediately, see a physiotherapist
Dull ache after session = reduce volume next session
The widely accepted guideline is 12–18 months of consistent climbing before beginning structured hangboard work. This is not about climbing grade — it’s about tendon conditioning time. Your flexor tendons and annular pulleys need this window to develop the baseline load tolerance for repeated hangboard loading. Some coaches extend this to 24 months for climbers who have never done a strength sport before. A practical readiness test: if you can climb 3 days per week pain-free, have no recurring finger soreness, and can comfortably hang a 30mm edge with full bodyweight for 15+ seconds, your tendons are likely ready for a conservative beginner programme. If any of those criteria aren’t met, more time on the wall is the right answer.
Two sessions per week is the standard recommendation, with 48–72 hours between sessions. Tendon tissue remodelling takes at least 48 hours after loading — training before this is complete means each session starts from a partially depleted baseline, which reduces gains and increases injury risk. Three sessions per week is appropriate only for advanced climbers doing short, lower-intensity work (like 10/5 density repeaters). Beginners should start with one session per week, assess tendon response for two weeks, then add a second session if everything feels healthy. The relationship between hangboard progress and session frequency is not linear — more sessions do not equal faster gains above the threshold of adequate recovery.
For high-volume training, wood wins on skin health. For precision progress tracking, plastic wins on edge standardisation. The practical difference: a 20mm wooden edge (Metolius Wood Grips Deluxe II, Beastmaker 1000) feels harder than a 20mm plastic edge (Simulator 3D) because the lower friction forces you to rely more on pure finger flexion with less texture assistance. This isn’t objectively better or worse — it means the relative difficulty of the same nominal edge depth differs between materials. For climbers doing 3+ sessions per week, wood is significantly more forgiving on skin, which is often the limiting factor in training volume before the fingers are. Most serious climbers own both and use wood for repeater volume and plastic for variety and max hang tracking.
Both — but prioritise half-crimp first, then open-hand, and avoid full crimp unless sport-specifically necessary. Half-crimp is the most direct training position for the A2 and A4 pulleys that limit climbing performance on crimps. It produces the strongest training stimulus per unit of injury risk. Open-hand grip is safer, transfers well to slopers and pockets, and should make up a significant portion of training volume — particularly for climbers who sport-climb on slabby or featured limestone. The classic recommendation is approximately 60% half-crimp / 30% open-hand / 10% pocket work for a sport climbing-oriented programme. For boulderers on overhung terrain, the split moves more toward half-crimp. Full crimp should only be trained when your project specifically demands it — never as a default training position.
Not until you’ve exhausted edge-depth progression. The simplest and safest progression variable is edge depth — starting on a 30mm edge, moving to 25mm, then 20mm, then 15mm, all at bodyweight. Most climbers can get to 5.12+ / V6 range purely through this progression without ever touching a weight belt. Once you can hang a 14–16mm edge for 7 seconds at bodyweight at near-maximum effort, then it makes sense to move to a more comfortable 18–20mm edge with added weight instead of continuing to use smaller, more stressful edges. Added weight on a comfortable edge is generally lower injury risk than bodyweight on very small edges, and is the correct progression for climbers above 5.12/V6 who want to continue making gains.
The A2 pulley is a fibrous sheath on the palm side of your ring finger (and sometimes middle finger) that holds the flexor tendon close to the bone. It is the most commonly injured structure in rock climbing. A pulley strain typically presents as: a popping sensation during a hard crimp (sometimes absent in minor strains), localised pain or tenderness on the inside of the proximal knuckle, swelling, and pain when pressing directly on the A2 (palm-side, first knuckle area). Minor strains (Grade 1) may present as only mild discomfort; moderate strains (Grade 2) involve pain with resistance; severe strains or ruptures (Grade 3–4) involve significant swelling, possible bowstringing of the tendon, and pain with any gripping. If you suspect a pulley injury, stop hangboarding immediately and see a physiotherapist or sports medicine doctor before resuming any finger loading.
Yes — but sequence matters, and it should be specific to your goal. For strength development, always hangboard first (before climbing), when finger tendons are fresh and neural drive is highest. Post-climbing hangboarding produces significantly lower training stimulus because tendons are already partially fatigued — the loading is there, but the quality of the strength adaptation is reduced. Alternatively, many coaches recommend keeping hangboard sessions and climbing days completely separate (e.g., hangboard on Monday/Thursday, climbing on Tuesday/Friday/Saturday). This is the most recovery-friendly approach. What to avoid: hanging heavy after a long bouldering session, or doing high-volume repeaters before attempting a climbing project. Both of these configurations sacrifice quality in both activities.
✓ Final TakeawayHangboard training is the highest-leverage intervention available to intermediate and advanced climbers — but only when applied correctly. Don’t start until you’ve been climbing 12–18 months. Begin on large holds with conservative loads. Progress edge depth before adding weight. Run one protocol per block for 4–8 weeks, not a mixture. Rest at least 48 hours between sessions. Train antagonists every session. The climbers who make the most consistent long-term progress on the hangboard are not the ones who train hardest — they are the ones who train most consistently, without injury, for the longest period of time.