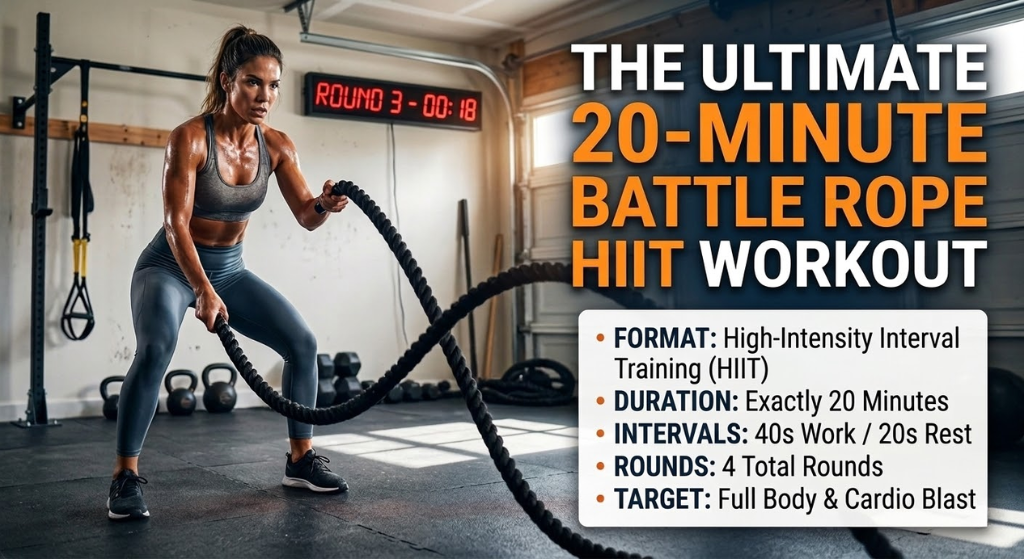
20-Minute Battle Rope HIIT Workout — Full Protocol (2026)
A complete, structured 20-minute battle rope HIIT session with exact intervals, exercise order, coaching cues, and an 8-week progression plan. Designed to maximise calorie burn and conditioning output in the shortest effective training window — from beginner-accessible to advanced.
📋 In This Guide
- Why 20 Minutes Is Enough
- Before You Start — Equipment & Setup
- Phase 1 — Warm-Up (3 min)
- Phase 2 — HIIT Block (12 min)
- Phase 3 — Power Finisher (3 min)
- Phase 4 — Cool-Down (2 min)
- 8-Week Progression Plan
- Muscles Worked
- Rope Weight & Sizing
- Common Mistakes
- 10 & 30-Minute Variations
- Using This Protocol for Fat Loss
- For Athletes & Combat Sports
- Outdoor vs Indoor Training
- Battle Ropes vs Other HIIT Tools
- Injury Prevention
- Rope Care & Storage
- Seniors, Beginners & Rehab
- Tracking Progress
- Frequently Asked Questions
Battle ropes are unusual among conditioning tools: they produce a cardiovascular response comparable to sprint intervals but require almost no skill to start and carry very little injury risk when used correctly. The challenge isn’t learning the movement — it’s structuring the work and rest correctly so the session actually drives adaptation rather than just creating fatigue.
This protocol is built around four phases with specific work-to-rest ratios for each. The 20-minute total includes warm-up and cool-down — the actual high-intensity work is 15 minutes, which is the sweet spot for rope conditioning before cumulative fatigue starts degrading movement quality.
Why 20 Minutes Is Enough
The critical variable is work interval quality, not session length. A 20-second alternating wave sprint performed at genuine maximum speed produces a higher metabolic output than 2 minutes of moderate-pace waving. The protocol below is built around this principle: short, maximal work intervals with enough rest to actually recover and maintain quality.
EPOC (excess post-exercise oxygen consumption) — the elevated calorie burn that continues after the session ends — is significantly higher after high-intensity interval work than steady-state cardio. For a 20-minute HIIT session, the EPOC effect can add 50–100 kcal to the total burn over the following 12–24 hours.
Before You Start — Equipment & Setup
- Rope: 9 m × 38 mm polypropylene — the home gym standard. A 38 mm rope allows the wave speeds this protocol requires; 50 mm is appropriate only for intermediate-level weeks 5+.
- Anchor: Fixed wall anchor, bolted squat rack, or floor plate. The anchor must not move under load — any shift disrupts wave mechanics and reduces intensity.
- Working distance: Stand 4–4.5 m from the anchor. The rope should be taut but not rigid at the start of each set. Mark your position with tape if needed.
- Flooring: Rubber gym matting (20 mm minimum) under your feet. Prevents slipping during lateral movements and protects the rope at the anchor contact point.
- Timer: A countdown interval timer (Tabata Timer, HIIT Timer app, or similar) set to the work/rest periods specified below. Trying to count seconds manually breaks focus and degrades work quality.
- Water: Within reach. Heart rate spikes are fast — 90 seconds in, most people are breathing hard. Sip during rest intervals.


Phase 1 — Warm-Up (3 Minutes)
The warm-up has two jobs: elevate heart rate to approximately 60% max so the HIIT block starts from a primed state, and mobilise the shoulders, wrists, and hips that will be under load. Skip this and the first HIIT round will feel brutal — and injury risk in cold tissue is meaningfully higher.
Phase 2 — HIIT Block (12 Minutes)
Four rounds, three exercises per round, 30 seconds work / 30 seconds rest (1:1 ratio). This is the core of the session. The 1:1 ratio is the minimum rest needed to sustain quality across all four rounds — reducing rest further is only appropriate once this feels manageable across every round.
Target heart rate during work intervals: 85–95% max. If you can hold a conversation during work intervals, you’re not working hard enough. If you can’t recover in the 30-second rest, reduce wave speed (not rest duration) until fitness improves.
Phase 3 — Power Finisher (3 Minutes)
After the HIIT block, take a full 60-second standing rest. The power finisher uses slam-based movements at maximum single-effort output. These are different from the sustained-intensity work in Phase 2 — each rep is maximal power with full recovery between reps. This develops the explosive shoulder and upper-back strength that carries over to athletic performance and heavy pressing.
Phase 4 — Cool-Down (2 Minutes)
Two minutes is sufficient for post-HIIT rope work. The goal is returning heart rate toward baseline and restoring shoulder range of motion that contracts under sustained load. Don’t skip this — the cumulative effect of cutting cool-downs is elevated DOMS and reduced range of motion in subsequent sessions.
8-Week Progression Plan
The protocol above is the Week 3–4 version — intermediate pacing with 1:1 work-to-rest. Below is the full 8-week progression: how to scale back if you’re starting from zero, and how to advance once this feels manageable.
| Weeks | Work | Rest | Rounds | Key Change |
|---|---|---|---|---|
| 1–2 | 20 sec | 40 sec | 3 | Learn movement quality. Never sacrifice form for speed. Total session ~16 min. |
| 3–4 | 30 sec | 30 sec | 4 | This protocol. 1:1 ratio, full 4 rounds, power finisher added. |
| 5–6 | 35 sec | 25 sec | 4 | Work increases, rest shortens. Add 50 mm rope option if 38 mm feels easy. |
| 7–8 | 40 sec | 20 sec | 4–5 | 2:1 work-to-rest ratio. Add 5th round or extend power finisher to 4 sets. |
| Beyond 8 | 40 sec | 20 sec | 5 | Upgrade rope to 50 mm for additional resistance without increasing volume. |
Muscles Worked by Battle Rope Training
One of the reasons battle ropes deliver so much conditioning value in so little time is that almost no muscle group is left idle. Unlike a treadmill or bike, where the lower body does nearly all the work and the upper body is passive, a properly executed wave recruits the shoulders, upper back, core, grip, and — once you add the squat, lunge, and shuffle variations used in this protocol — the entire lower body as well. Understanding which muscles are doing the work helps you self-correct form and explains why fatigue in this session feels so different from a run or a cycling class.
Shoulders and Upper Back
The anterior and posterior deltoids drive the up-and-down phase of every wave, while the trapezius and rhomboids stabilise the shoulder blade so the arm has a solid base to pull against. This is why beginners often feel their traps burning before their arms do — the stabilising muscles fatigue faster than the prime movers because they’re working isometrically the entire set, not just during the concentric phase of the movement.
The rotator cuff group — supraspinatus, infraspinatus, teres minor, and subscapularis — works continuously to keep the shoulder joint centred as the rope whips through its arc. This is a double-edged sword: light-to-moderate rope work is genuinely excellent for rotator cuff resilience, but doing too much, too soon, especially with a rope that’s too heavy, is one of the more common ways lifters aggravate a dormant shoulder issue. The circles and slow waves programmed into the warm-up and cool-down of this protocol exist specifically to build rotator cuff capacity gradually rather than throwing it straight into maximal effort.
Forearms and Grip
Every wave, slam, and circle requires a firm but not white-knuckled grip on the rope. The forearm flexors and extensors, along with the intrinsic hand muscles, are working the entire session. This is one reason battle rope training carries over so well to sports and activities that depend on grip endurance — climbing, wrestling, grappling, and manual labour all benefit from the kind of sustained, high-output grip demand a rope session creates. If your forearms are the limiting factor before your cardiovascular system is, that’s a normal early-stage adaptation and it resolves within a few weeks of consistent training.
Core and Obliques
The side-to-side wave pattern in particular loads the obliques heavily as the trunk resists rotational force with every pass. The rectus abdominis and transverse abdominis brace throughout every exercise to transfer force from the lower body through the trunk into the arms — this is the same core function used in a heavy deadlift or an overhead press, just at a much higher tempo. Poor core bracing is one of the most common reasons wave quality collapses in the later rounds: the trunk starts to sway, energy leaks out of the kinetic chain, and the waves get weaker even though the arms are still moving fast.
Lower Body
The squat, lunge, and lateral shuffle variations built into Rounds 2 and 3 of the HIIT block turn this from a pure upper-body conditioning tool into a genuine full-body session. The quadriceps, glutes, and hamstrings are doing real work during the squatting and lunging variations, and the hip abductors and adductors are heavily taxed during the lateral shuffle. Combining lower-body movement with upper-body wave work also raises heart rate faster than either movement alone, which is part of why this protocol reaches 85–95% max heart rate within the first 30-second interval of the HIIT block.
- Alternating waves: anterior/posterior deltoid, trapezius, forearms, core (anti-rotation)
- Double waves: deltoids (bilateral), lats, upper back, core (anti-extension)
- Side-to-side waves: obliques, deltoids, forearms, hip stabilisers
- Waves + squat / lunge: quadriceps, glutes, hamstrings, plus all upper-body wave musculature
- Lateral shuffle + waves: hip abductors/adductors, calves, core, deltoids
- Overhead slams: lats, triceps, core (flexion), grip, and — through the deceleration phase — the posterior chain
Rope Weight, Diameter & Length — Choosing the Right Setup
Battle rope specifications are described in three dimensions: length, diameter, and material, and each one changes how the rope behaves under load. Getting this wrong is the single most common reason people find rope training either pointless (too light, no resistance) or unsustainable (too heavy, form collapses within seconds).
Length
Most home training happens with 9–12 m ropes, which give 4.5–6 m of usable working distance once folded around the anchor. This protocol is written around a 9 m rope with 4–4.5 m of working distance, which is enough to generate a full, clean wave without requiring a warehouse-sized space. Commercial gyms sometimes use 15 m ropes for advanced athletes because the extra length increases the amount of rope mass in motion at any given time, which raises the resistance without needing a thicker rope.
Diameter
Diameter is the main lever for adjusting resistance for most home users:
| Diameter | Best For | Approx. Weight (9m) | Notes |
|---|---|---|---|
| 25–32 mm | Beginners, smaller frames, rehab work | ~7–9 kg | Easier to reach high wave speed; less overall resistance |
| 38 mm | General fitness, this protocol | ~11–13 kg | Balance of resistance and wave speed capability |
| 44 mm | Intermediate–advanced conditioning | ~14–17 kg | Noticeably harder to sustain fast waves; better for strength-endurance |
| 50 mm | Advanced users, strength focus | ~18–22 kg | Appropriate once 38 mm feels genuinely easy across all 4 rounds |
Material
Polypropylene (often called poly dacron) is the standard for home gyms — it’s weather-resistant, doesn’t absorb water like natural fibre ropes, and holds up well to being dragged across concrete or rubber flooring. Nylon-core ropes are more common in commercial settings, offering a slightly different hand feel and often a longer lifespan under heavy daily use, but at a meaningfully higher price point that isn’t necessary for 2–4 sessions per week at home.
Common Mistakes That Reduce Results
Battle ropes look simple, which is exactly why so many people do them badly. The movement pattern doesn’t punish poor technique the way a barbell squat does — you won’t get injured immediately from a sloppy wave — but poor technique quietly caps how much benefit you get from every session. These are the mistakes that show up most often, in rough order of how much they cost you.
| Mistake | Why It Hurts Results | Fix |
|---|---|---|
| Waving from the wrists only | Isolates the forearms, produces a weak, short wave that never reaches full amplitude at the anchor | Drive the wave from the shoulder, with the whole arm moving through a large arc |
| Standing too upright, no hip hinge | Removes the lower body and core from the movement, turning it into pure arm work | Sit into a quarter-squat athletic stance with a slight forward hip hinge throughout |
| Working through the full 30 seconds at 60% effort | Keeps heart rate in a moderate zone instead of the 85–95% target — you get a worse cardio stimulus than jogging | Treat every work interval as a sprint. Speed should genuinely drop off in the final 5 seconds because you went hard from second one |
| Cutting rest short to “push through” | Compounds fatigue across rounds so quality in Round 3–4 collapses, undermining the whole point of interval structure | Respect the prescribed rest. The interval structure is what makes this effective — it isn’t optional padding |
| Skipping the warm-up on “easy” days | Cold shoulders under sudden ballistic load are the leading cause of rope-related strains | Always run the full 3-minute warm-up, even on days you feel great |
| Using a rope that’s too heavy for current fitness | Forces slow, low-frequency waves that don’t reach the intensity zone needed for HIIT adaptation, and overloads the shoulder joint | Drop diameter until you can sustain genuinely fast waves for the full work interval |
| Same grip and stance for every set | Overuses the same tissue in the same pattern, increasing overuse injury risk over weeks of training | Rotate through alternating, double, lateral, and circular patterns as programmed — this protocol already does this deliberately |
10-Minute and 30-Minute Variations
Twenty minutes is the sweet spot for this specific structure, but real life doesn’t always give you 20 free minutes, and some days you want more volume. Both shorter and longer versions work if you adjust the structure rather than just adding or cutting rounds arbitrarily.
The 10-Minute Express Version
Cut the warm-up to 90 seconds (two of the four warm-up exercises), run two HIIT rounds instead of four, and skip the power finisher, going straight into a 90-second cool-down. This keeps the work-to-rest structure intact within each round, which matters more for intensity than total volume. A 10-minute session is genuinely useful on high-stress days or as a finisher after a strength session — it won’t build conditioning as quickly as the full 20-minute protocol, but it’s dramatically better than skipping training altogether.
| Phase | 10-Min Version | 20-Min Version (This Protocol) | 30-Min Version |
|---|---|---|---|
| Warm-up | 1:30 (2 exercises) | 3:00 (4 exercises) | 4:00 (full + extra mobility set) |
| HIIT block | 2 rounds (~6:00) | 4 rounds (12:00) | 5 rounds (~17:00) |
| Power finisher | Skipped | 3:00 | 4:30 (4 sets instead of 3) |
| Cool-down | 1:30 | 2:00 | 3:00 |
| Total | ~10 min | 20 min | ~29 min |
The 30-Minute Extended Version
Add a fifth HIIT round using the same exercise pool (rotate back to Round 1’s exercises with a slightly shorter rest, e.g. 30s work / 25s rest), extend the power finisher to four overhead slam sets instead of three, and lengthen the cool-down to include a full static stretching sequence for the shoulders, lats, and hip flexors. Thirty minutes of rope work is genuinely demanding — reserve it for days when rope training is your main session rather than a supplement to strength work, and don’t run it more than twice a week even at an advanced level.
Using This Protocol for Fat Loss
Battle rope HIIT is a popular choice for fat loss goals, and for good reason — it combines a high calorie burn per minute with an EPOC effect that keeps metabolism elevated after the session ends. But a single 20-minute session, however intense, isn’t a fat loss strategy on its own. Here’s how to use this protocol as one piece of a broader approach that actually produces the body composition change most people are chasing.
Frequency and Weekly Structure
Three sessions per week of this protocol, combined with two to three resistance training sessions and a modest, sustainable calorie deficit, is a realistic structure for consistent fat loss over 8–12 weeks. Battle ropes alone, even performed daily, will not outrun a calorie surplus — the total burn of 200–300 kcal per session plus EPOC is meaningful but modest compared to the calorie content of most meals. The value of this protocol for fat loss is less about the raw calorie burn and more about the metabolic conditioning improvements and the fact that it’s sustainable and repeatable in a way that grinding out an hour on a treadmill often isn’t.
Why Interval Structure Matters for Fat Loss Specifically
Steady-state cardio at a moderate pace primarily burns fat as fuel during the session itself, but the total energy expenditure per minute is lower than HIIT. Interval training at 85–95% max heart rate burns more total calories per minute during the session and extends elevated metabolic rate afterward through EPOC. For someone with limited training time, this makes a 20-minute rope session a more time-efficient fat loss tool than 45 minutes of incline walking, even though both have a place in a well-rounded programme.
Combining With Diet
No conditioning protocol, including this one, compensates for a diet that runs a large calorie surplus. The most successful approach pairs this session with a moderate protein intake to preserve lean mass during a deficit, consistent daily step counts outside of formal training, and enough sleep to support recovery between the three weekly rope sessions. Rope training performed in a severe, under-fuelled deficit tends to produce poor wave quality and elevated injury risk because the fast-twitch output the protocol demands needs adequate glycogen availability.
For Athletes and Combat Sports
Battle ropes have become a staple in wrestling rooms, MMA gyms, and strength and conditioning programmes for field sport athletes, and the reasons go beyond general fitness. The specific demands of rope training map closely onto qualities that matter in grappling, striking, and repeated-sprint sports.
Grip Endurance Under Fatigue
Wrestlers and grapplers need grip that holds up deep into a match when the rest of the body is exhausted. Because rope training taxes the forearms continuously across every interval, it builds exactly this kind of fatigue-resistant grip. Adding the power finisher’s overhead slams, which demand a strong grip through a high-force deceleration, further reinforces this quality.
Repeated High-Output Efforts
Combat sports and most field sports don’t require one maximal effort — they require the ability to produce near-maximal output again and again with incomplete recovery between bursts. The 1:1 work-to-rest structure in the HIIT block of this protocol trains exactly that pattern, and the power finisher’s short, maximal slam efforts mirror the explosive output needed for a takedown, a sprint to the ball, or a striking combination.
Shoulder Durability for Striking and Overhead Sports
The rotator cuff and scapular stabiliser work embedded throughout this protocol — particularly in the warm-up circles and the cool-down stretching — builds the kind of shoulder resilience that supports repeated overhead and rotational movement without breaking down over a season. Athletes in swimming, throwing sports, and combat sports with heavy clinch or overhook work often find rope training reduces shoulder fatigue and soreness from their primary sport when programmed two to three times per week.
Programming for Athletes
For in-season athletes, this protocol works best as a conditioning finisher after skill work, twice per week, rather than as a standalone session — sport-specific practice should always take priority for skill development. In the off-season, it can be run three times weekly as a standalone conditioning block, following the 8-week progression table to build a genuine base before returning to sport-specific conditioning closer to competition.
Outdoor vs Indoor Battle Rope Training
Where you train changes a few practical details of this protocol, even though the exercise programming itself doesn’t need to change.
Training Outdoors
A tree, a fence post rated for load, or a dedicated outdoor anchor point all work, provided the anchor genuinely doesn’t move — the same rule as indoors. Outdoor training has real advantages: unlimited working distance means longer ropes and bigger waves are possible, ground surface is less of a concern than on a gym floor, and many people find outdoor HIIT sessions psychologically easier to push hard through than an indoor gym setting. The trade-offs are weather dependency and, in wet conditions, a slicker rope that’s harder to grip securely — dry the rope thoroughly before storage to prevent mildew and rot in natural fibre ropes, and even polypropylene benefits from air-drying before being coiled away.
Training Indoors
Indoor training gives consistent conditions year-round but usually means a shorter working distance, which is exactly why this protocol is written around a 9 m rope and 4–4.5 m of working space — a specification chosen to fit inside a typical home gym, garage, or basement rather than requiring the space a 15 m commercial rope demands. Ceiling height matters less than most people expect for standard wave patterns, but the overhead slams in the power finisher do require enough vertical clearance to fully extend the rope overhead — check for exposed pipes, light fixtures, or low ceilings before the first session.
Battle Ropes vs Other HIIT Tools
Battle ropes are one of several tools capable of delivering an effective HIIT stimulus. Understanding where they fit relative to alternatives helps decide whether to build a session around ropes alone or combine tools for variety.
| Tool | Joint Impact | Skill Needed | Space Needed | Best For |
|---|---|---|---|---|
| Battle Ropes | Very Low | Minimal | Moderate (4–5m) | Upper-body-biased conditioning, grip, shoulder resilience |
| Jump Rope | Moderate | Moderate (coordination) | Minimal | Lower-body conditioning, coordination, portability |
| Assault/Air Bike | Very Low | Minimal | Moderate (fixed unit) | Full-body, highly measurable output (watts, calories) |
| Rowing Machine | Low | Moderate (technique) | Moderate (fixed unit) | Full-body, low-impact, posterior chain emphasis |
| Sprint Intervals (running) | High | Minimal | None (outdoor) | Lower-body power, running-specific conditioning |
| Kettlebell Swings | Moderate | High (technique-dependent) | Minimal | Posterior chain power, hip hinge conditioning |
The clearest advantage battle ropes hold over most of this list is the combination of near-zero joint impact with a very short skill-acquisition curve — you can be doing an effective wave within the first minute of ever touching a rope, unlike kettlebell swings, which take real coaching to perform safely under fatigue. The main limitation is that ropes are more upper-body dominant than a bike or rower unless you deliberately add the lower-body integration exercises this protocol includes.
Injury Prevention and Safety Considerations
Battle rope training has a strong safety profile compared to most HIIT tools, largely because there’s no external load slamming against joints and no complex barbell technique to get wrong under fatigue. That said, a handful of specific risks are worth planning around.
Shoulder Overuse
This is the most common issue in people who train ropes frequently without variety. Doing nothing but maximal alternating waves, session after session, loads the same shoulder pattern repeatedly and can produce impingement-type symptoms over weeks or months. This protocol deliberately rotates through alternating, double, lateral, and circular wave patterns specifically to distribute load across different parts of the shoulder complex rather than hammering one movement pattern exclusively.
Lower Back Strain from Poor Positioning
Rounding the lower back while leaning too far forward over the rope, especially during fatigued late-round intervals, is a common technique breakdown that can aggravate the lumbar spine. Maintaining a braced, neutral spine with the hip hinge coming from the hips rather than the lower back resolves this — if you notice your lower back rounding as fatigue sets in, that’s a cue to reduce wave speed rather than push through with degraded posture.
Wrist and Grip Strain
Gripping too tightly, or using a rope that’s too thick for your hand size, increases forearm and wrist strain unnecessarily. A relaxed but secure grip — firm enough to control the rope, not a white-knuckle squeeze — reduces this risk considerably and also improves wave speed, since a death-grip actually slows down the wrist’s ability to whip the rope.
Slipping and Environmental Hazards
Sweat on a hard floor combined with fast lateral footwork in the shuffle variations is a genuine slip risk. Rubber gym flooring, as specified in the setup section, largely eliminates this, and towelling down the floor between rounds on hot or humid days is a simple habit that prevents an entirely avoidable fall.
Rope Care, Storage & Anchor Maintenance
A well-maintained rope lasts years of regular training; a neglected one frays, develops weak points, and eventually fails at the worst possible moment — usually mid-slam. A few minutes of care after each session prevents this.
After Each Session
Inspect the last 30 cm at each end for fraying, since this is the section that contacts the floor hardest during slams and drags across the anchor point during waves. Wipe down visible dirt or sweat, and if training outdoors in wet conditions, allow the rope to air-dry fully before coiling it away — storing a damp polypropylene rope in a sealed bag or bin encourages mildew and, over time, can weaken the fibre.
Storage
Coil the rope loosely rather than in tight, small loops, which creates kinks that become permanent over time and disrupt clean wave mechanics. A wall-mounted rope hook, a large storage bag, or simply a loose coil on a shelf all work — the goal is avoiding pressure points and moisture retention. Keep the rope away from direct sunlight for long-term storage, since UV exposure degrades polypropylene fibres faster than normal use does.
Anchor Inspection
Whatever anchor system is used — a wall strap, a squat rack attachment, or a floor plate — check the hardware periodically for wear, particularly at any point where metal contacts the rope directly. A frayed strap or a loosening bolt is a much more serious failure point than the rope itself, since a failed anchor releases tension suddenly and can cause the rope to whip back unpredictably.
Battle Ropes for Beginners, Seniors & Rehab Contexts
While this specific protocol is written for a general fit adult audience at an intermediate level, the underlying tool scales well across ability levels when the intensity and volume are adjusted appropriately.
True Beginners
Someone who has never trained with ropes before, or is returning after a long layoff, should start with the Weeks 1–2 progression parameters from the table above — 20 seconds work, 40 seconds rest, three rounds — using a lighter 25–32 mm rope if available. The priority for the first two to three sessions isn’t intensity at all; it’s learning to generate a clean wave with the shoulders and hips rather than the wrists, since that movement pattern is what everything else in this protocol builds on.
Older Adults
Battle ropes can be an appropriate conditioning tool for older adults with good baseline joint health, but the ballistic, high-speed nature of maximal wave work isn’t the right starting point. A slower, controlled version — using the warm-up and cool-down exercises from this protocol as the entire session, rather than progressing into the maximal HIIT block — offers cardiovascular and shoulder mobility benefit with dramatically lower joint stress. Anyone with existing shoulder arthritis, a history of rotator cuff surgery, or uncontrolled cardiovascular conditions should get clearance from a physician before starting, given the heart rate demands of the full protocol.
Rehabilitation Contexts
Physical therapists sometimes use very light, slow rope work as part of shoulder rehabilitation programmes, specifically because the movement pattern can be scaled to an extremely low intensity while still working through a full range of motion. This use case is fundamentally different from the HIIT protocol in this guide — rehab applications use much lighter ropes, far slower tempos, and are programmed by a qualified clinician based on the specific injury and healing timeline, not by following a general conditioning article. Anyone recovering from a shoulder, elbow, or wrist injury should treat rope training as an activity to discuss with their treating clinician rather than something to self-prescribe from a fitness guide.
Tracking Progress Over Time
Because battle rope training doesn’t have an obvious external number like a barbell’s weight plates, progress can feel harder to measure than it actually is. A few simple metrics make it easy to see genuine improvement across the 8-week progression.
Wave Count
Counting total wave repetitions during a fixed work interval (for example, the Round 1 alternating wave set) and logging it session to session is the simplest progress marker available. An improving wave count at the same work interval length is a direct, objective measure of both power output and local muscular endurance.
Heart Rate Recovery
If you’re using a heart rate monitor, track how far heart rate drops during each 30-second rest period between exercises. As conditioning improves, heart rate recovery during a fixed rest period gets faster — this is one of the clearest physiological signs that the cardiovascular adaptation from this protocol is actually happening, independent of whether wave speed or rope weight has changed.
Perceived Effort at a Fixed Workload
Simply noticing that the same 30-second work interval, at the same rope weight and speed, feels easier over successive weeks is a valid and useful signal, even without formal numbers. This is the cue that tells you it’s time to progress to the next stage of the 8-week table rather than staying at the current level indefinitely.
| Metric | How to Track | What Improvement Looks Like |
|---|---|---|
| Wave count | Count reps in a fixed 30s interval, log weekly | Steady increase at the same rope weight and interval length |
| Rounds completed | Note how many of the 4 HIIT rounds are finished with full quality | Consistent completion of all 4 rounds, then progression to Week 5–6 parameters |
| Heart rate recovery | Monitor HR drop during each 30s rest period | Faster recovery to a lower resting number within the same rest window |
| Perceived exertion | Rate effort 1–10 after each session | Same protocol feels progressively less maximal over 3–4 weeks |
Frequently Asked Questions
Train the Protocol, Then Progress It
The structure of this session — warm-up, four-round HIIT block, power finisher, cool-down — isn’t arbitrary. Each phase has a specific physiological purpose, and the sequencing ensures you hit maximum output during the HIIT block when the nervous system is primed but not yet fatigued.
Run this protocol consistently for 8 weeks following the progression table. By Week 8, the work-to-rest ratio will have shifted from 1:2 to 2:1 — an objective, measurable increase in conditioning capacity that maps directly to endurance on the wall, field, or court.
NEED A ROPE?
We tested the top battle ropes for home gym use — ranked by quality, durability, and value.
Best Battle Ropes Guide →