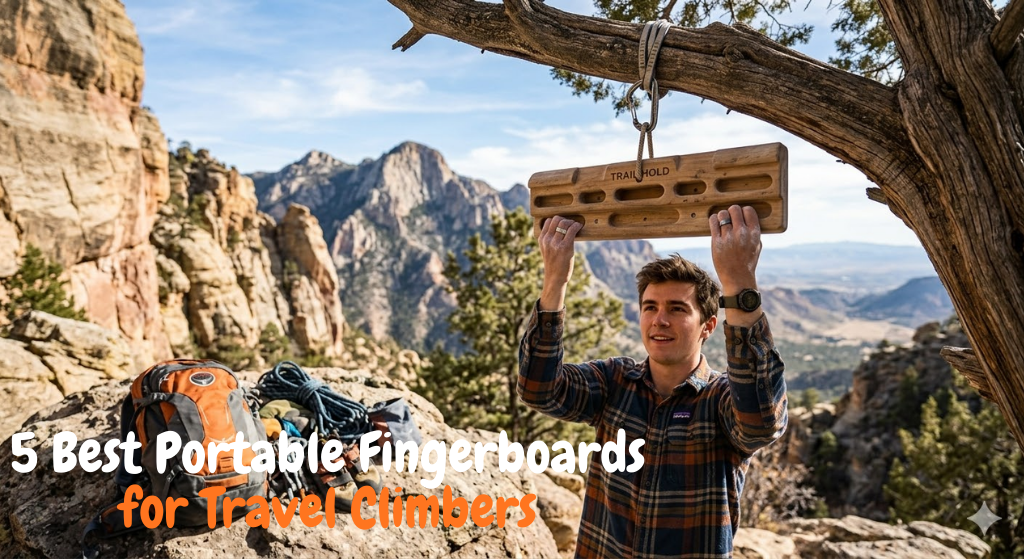
5 Best Portable Fingerboards for Travel Climbers
A portable hangboard is the most space-efficient training tool a travel climber can own. Under 2 lbs, installs in seconds on any pull-up bar, tree branch, or bolt hanger — and keeps your fingers conditioned through road trips, hotel stays, and van life climbing seasons. These are the five best options available on Amazon right now, ranked by training value, portability, and skin-friendliness.
📋 In This Guide
- Quick Answer — Our Top Pick
- What to Look For in a Portable Board
- Understanding Grip Types for Hangboard Training
- Wood vs Urethane vs Plastic — Material Deep-Dive
- #1 — Two Stones CJ-HB2055BX (Best Overall)
- #2 — So iLL Iron Palm (Best for Slopers & Pinches)
- #3 — YY Vertical La Baguette (Best Edge Training)
- #4 — POWER GUIDANCE Wooden (Best Budget)
- #5 — Two Stones Pull-Up Ring (Best for Beginners)
- Complete Portable Hangboard Training Protocols
- Injury Prevention & Finger Tendon Science
- Side-by-Side Comparison Table
- Which One Should You Buy?
- Frequently Asked Questions
- Hangboard Training for Older Climbers (40+)
- Periodization & Seasonal Integration
Quick Answer — Our Top Pick
What to Look For in a Portable Hangboard
Portable hangboards are not miniature versions of wall-mounted boards — they’re a different product category with different design priorities. Before buying, understand exactly what variables matter for a board you’ll be throwing in a pack and hanging from crags, gym pull-up bars, and hotel door frames.
- Weight & pack size: Under 1 lb is excellent. Over 2 lbs starts to eat into climbing pack space. The lightest boards (La Baguette at 380g) fit in a chalk bag pocket.
- Mounting method: Rope-hang boards are the most versatile — they work anywhere there’s a bar, branch, or bolt hanger. Strap-hang systems add friction but reduce anchor compatibility. Avoid boards that require a doorframe bracket for travel use.
- Hold variety: The minimum useful portable board has two edge depths and allows both half-crimp and open-hand grips. Boards with pockets add pocket training; slopers add contact strength work.
- Edge finish: Look for R3–R5 filleted (rounded) pocket edges — sharp edges cause skin damage and force shorter sessions. CNC-milled boards from a single wood block are more consistent than spliced or glued constructions.
- Weight rating: Check the stated weight limit. Most portable boards are rated 220–400 lbs — sufficient for weighted hang protocols, but always verify before adding load.
- Material: Wood is almost universally better than plastic for portable boards — lighter, skin-friendlier, and comfortable for volume sessions. Urethane (So iLL) is an exception with excellent grip properties.
Understanding Grip Types for Hangboard Training
Before you choose a portable hangboard or begin any finger training programme, you need to understand the grip types that matter for climbing performance. Each grip position loads your finger tendons, pulleys, and forearm muscles differently — and training all of them is the difference between a balanced, injury-resistant climber and one who’s strong in one position but fragile everywhere else. This section breaks down every grip type you’ll encounter on a portable board and explains which boards in this guide support each one.
Half-Crimp Grip
The half-crimp is the single most important grip position for hangboard training and the one most climbing coaches recommend as your primary training grip. In a half-crimp, your fingers are bent at roughly 90 degrees at the middle knuckle (the proximal interphalangeal joint), with the fingertips pressing down on the edge of the hold. Your thumb can wrap around or sit alongside — on a hangboard, it typically doesn’t participate. The wrist stays neutral, neither flexed nor extended.
Why the half-crimp is so critical: research from the University of Sheffield and other climbing-specific biomechanics labs shows that the half-crimp position produces the most balanced force distribution across all four finger tendons. It sits between the fully open position (where the tendons aren’t loaded as intensely) and the full crimp (where the A2 pulley is under maximum strain). Training in half-crimp builds finger strength that transfers effectively to open-hand positions while being safer than full-crimp training. Every board in this guide supports half-crimp training on its edge rails.
Open-Hand (Drag) Grip
In an open-hand or drag grip, the fingers are extended more than in a half-crimp — the middle knuckle is at roughly 135–160 degrees, and the fingertips drape over the edge with the last finger segment angled downward. The wrist may be slightly extended (bent backward). This position places more load on the finger flexor tendons in their lengthened position and less stress on the pulleys compared to crimped positions.
Open-hand grip is essential for two reasons. First, most climbing actually happens in some variation of open hand — you only full crimp on the hardest moves. Second, open-hand training has a significantly lower injury risk than crimped positions, making it the recommended starting position for beginners and the preferred position for high-volume training sessions. On portable boards, open-hand training typically uses deeper pockets and wider edges where the fingers can wrap more gently over the hold. All five boards in this guide support open-hand training to varying degrees — the Two Stones CJ-HB2055BX and the Pull-Up Ring boards offer the deepest pocket options for comfortable open-hand work.
Full Crimp Grip
The full crimp is the most aggressive grip position: the fingers are bent past 90 degrees at the middle knuckle, the last finger segment curls sharply over the edge, and the thumb locks over the index finger to create a closed kinetic chain. This position generates the highest fingertip force output of any grip — but at a cost. The A2 pulley (the pulley closest to the palm at each finger’s base) experiences forces up to 4× body weight during a full crimp on small edges. This is the grip responsible for the majority of serious finger injuries in climbing.
Most climbing coaches now recommend against training full crimp on a hangboard. The risk-reward ratio doesn’t make sense when you can build substantial half-crimp and open-hand strength that transfers to crimp positions. Full crimping is an expression of existing strength, not a training position. If you use full crimp on your projects, the strength you built in half-crimp and open-hand will support it — you don’t need to train it directly. This is especially true on portable boards, where you may not have the same control over loading as on a wall-mounted board with a pulley system. None of the boards in this guide are designed for full-crimp training, and that’s intentional.
Pocket Grips (1, 2, 3, and 4-Finger)
Pocket grips involve inserting specific fingers into recessed holds — most commonly 2-finger (middle and ring), 3-finger (index, middle, ring), and occasionally 1-finger (mono) pockets. The depth of the pocket determines how much finger engagement is required: a deep 4-finger pocket is similar to a jug, while a shallow 2-finger pocket demands substantial tendon strength from just two fingers.
Pocket training is critical for climbers who encounter pocket-heavy rock types — limestone, tufas, and volcanic rock often feature pockets where only 2 or 3 fingers can fit. Two-finger pocket training specifically targets the middle and ring finger tendons, which are connected by a tendinous connection called the vinculum and naturally weaker in isolation than when all four fingers work together. Among the boards in this guide, the Two Stones CJ-HB2055BX offers the most pocket variety with 1/2/3/4-finger configurations at four depths, while the Two Stones Pull-Up Ring boards provide 5 pocket depths from jug to mono for graduated progression. The So iLL Iron Palm and the POWER GUIDANCE board do not include pockets — they train only on edges, slopers, and pinches.
Sloper Grip
Slopers are large, rounded holds that require an open palm pressed against the surface with fingers spread. There is no edge to grip — the hold relies entirely on friction, surface contact area, and wrist positioning. Force is generated through a combination of body positioning (keeping your centre of gravity below and behind the hold) and maximal skin friction. Slopers train contact strength — your ability to recruit maximum muscle fibre instantly on a hold — and are heavily dependent on body tension and core engagement.
Sloper strength is disproportionately important for boulderers. Many hard boulder problems feature compression-style moves on slopers where you must generate force with your entire hand surface against a rounded feature. Traditional pocket-and-edge hangboards don’t train this grip at all. Among portable boards in this guide, only the So iLL Iron Palm provides dedicated sloper holds — its two ball-shaped urethane slopers are among the best-designed sloper training surfaces in any hangboard category. If your climbing involves compression bouldering, the Iron Palm is the only portable board that addresses this gap. You can read more about training grip strength for climbing in our best grip trainers for rock climbers guide.
Pinch Grip
Pinch grips involve opposing the thumb against one or more fingers to squeeze a hold. On a hangboard, pinch blocks are typically protruding features that you grip between your thumb and fingers. Pinch strength is governed by thumb opposition strength — a component of grip that is entirely separate from finger tendon strength and is not trained by any edge, pocket, or sloper hold.
Pinch training is the most commonly neglected grip type in hangboard training, primarily because most hangboards (especially portable ones) don’t include pinch features. This is a significant gap: many outdoor climbing routes and boulder problems feature pinches of varying widths, and pinch strength is one of the slowest grip types to develop because thumb musculature responds to training more slowly than finger flexor tendons. The So iLL Iron Palm is the only board in this guide with dedicated pinch blocks. For climbers who don’t own the Iron Palm, combining a portable hangboard with a dedicated grip trainer that includes pinch functionality is the most effective approach.
- Half-crimp & Open-hand: All 5 boards in this guide
- Pocket grips (multi-depth): Two Stones CJ-HB2055BX (#1), Two Stones Ring Board (#5)
- Sloper grip: So iLL Iron Palm (#2) only
- Pinch grip: So iLL Iron Palm (#2) only
- Minimum-edge training: YY Vertical La Baguette (#3) — 6 labelled depths
Wood vs Urethane vs Plastic — Material Deep-Dive
Material choice is one of the most consequential decisions in hangboard selection, affecting skin comfort, grip friction, durability, weight, and long-term training quality. Most portable hangboards are made from wood, but the category also includes urethane (So iLL) and occasional plastic offerings. This section breaks down how each material performs across the variables that matter most for portable training.
Wood: The Default Choice
Wood is the material of choice for the vast majority of climbing-specific hangboards, and for good reason. Natural wood — whether birch, beech, maple, or the recycled rubberwood used by YY Vertical — provides a surface texture that balances friction with skin preservation. The grain structure of sanded wood creates micro-texture that holds chalk effectively without being abrasive, allowing longer training sessions before skin fatigue becomes the limiting factor.
CNC-milled wood boards offer the most consistent edge quality. When a pocket or edge is machined from a single wood block (as opposed to glued from multiple pieces), the edge radius is uniform across the entire hold and the risk of delamination under load is zero. The Two Stones CJ-HB2055BX and POWER GUIDANCE boards are both CNC-milled from single wood blocks. This matters for training because inconsistent edges force your fingers to micro-adjust during a hang, wasting energy on stabilisation rather than pure tendon loading.
Wood’s main limitation is environmental durability. Repeated exposure to moisture — rain at the crag, humidity in a van, condensation in a pack — causes wood to swell, warp, and eventually crack. If you’re climbing in consistently wet environments, a wooden portable board requires more careful storage and occasional re-sanding. However, for the vast majority of travel use cases, a quality wood board will last years without noticeable degradation.
Urethane: The Specialist Material
Urethane (polyurethane) is the material used by So iLL for the Iron Palm and several of their other climbing holds and hangboards. It’s a synthetic polymer that can be formulated to a wide range of hardnesses and surface textures. The Iron Palm uses a relatively hard urethane formulation with a slightly tacky surface texture that provides excellent chalk uptake and friction without the abrasiveness of rough plastic.
Urethane’s primary advantage over wood for a hangboard is durability in variable environments. It doesn’t absorb moisture, won’t warp or crack from humidity, and maintains its surface texture essentially indefinitely. For climbers who train outdoors regularly or live in humid climates, this is a meaningful benefit. Urethane also allows more complex three-dimensional hold shapes — the Iron Palm’s ball-shaped slopers and curved pinch blocks would be impossible to produce in wood at the same quality level.
The trade-off is skin fatigue. Urethane’s higher friction coefficient compared to sanded wood means more skin is abraded per unit of force during a hang. For short, intense sessions (max hangs, limit bouldering warm-ups), this doesn’t matter much. For high-volume protocols like repeaters or density hangs where you accumulate 10–20 minutes of total hang time, urethane wears skin faster than wood. At ~$100, the Iron Palm is also the most expensive board in this guide — but the material cost is justified by the unique hold shapes.
Plastic and Composite: The Budget End
Injection-moulded plastic boards exist in the budget segment, but they are less common in the portable category because plastic is typically heavier than wood for the same structural strength and provides a less comfortable training surface. Cheap plastic boards tend to have sharp, unfilleted edges that cause skin tears and hot spots during extended hangs. The surface texture is either too smooth (requiring excessive chalk) or too rough (causing skin abrasion).
We don’t recommend plastic portable hangboards in this guide. At the $25–55 price range where wood and recycled wood boards are available, plastic offers no material advantage. If you encounter a budget board made from plastic or unknown composite, check the edge radius carefully — run your fingertip across the hold surface before buying. If it feels sharp or creates a pressure point against your finger pad, the edge will cause skin damage during training. A well-finished wood board at the same price will always be more comfortable and more durable.
Material Comparison Summary
| Factor | Wood | Urethane | Plastic |
|---|---|---|---|
| Skin comfort | Excellent — long sessions | Good — moderate sessions | Poor — sharp edges common |
| Weight | Light (380g–750g typical) | Medium (hollow construction helps) | Heavy for same hold count |
| Durability (outdoor) | Moderate — moisture-sensitive | Excellent — weatherproof | Excellent — weatherproof |
| Grip friction | Balanced with chalk | High — tacky texture | Variable — too smooth or too rough |
| Edge precision | Excellent (CNC-milled) | Good (cast moulded) | Variable (injection moulded) |
| Price | $25–55 | $95–110 | $15–30 |
| Recommendation | Default choice for most climbers | Best for sloper/pinch training | Avoid in portable category |
Portable Hangboards for Non-Climbers: Grip Training Applications
While this guide is written for rock climbers, portable hangboard training has meaningful applications for anyone who needs strong hands and resilient finger tendons. If you’re a lifter, calisthenics athlete, or general fitness enthusiast considering a portable fingerboard, here’s how hangboard training applies to your goals:
- Deadlift grip strength: Hangboard dead hangs — particularly on shallow edges — build the same crushing grip endurance needed for heavy deadlift sets. If your grip fails before your posterior chain on heavy pulls, adding 2–3 sets of 20-second dead hangs on a 20mm edge to your warm-up will improve grip endurance within 4–6 weeks. See our guide on how grip strength improves deadlifts and pull-ups for a full breakdown.
- Pull-up strength: The Two Stones Pull-Up Ring board (#5 in this guide) doubles as a gymnastic ring and fingerboard combination. Training pull-ups on ring-shaped boards forces your grip to stabilise through wrist rotation — a stimulus that fixed bar pull-ups don’t provide. This translates to stronger, more resilient forearms for any pulling movement.
- General forearm development: If you care about forearm size and grip endurance for functional fitness, a portable hangboard is the most space-efficient tool you can own. Dead hangs on varying edge depths train the finger flexor digitorum profundus and superficialis muscles, the brachioradialis, and the wrist extensors — the complete forearm musculature. Compare this to dedicated grip strength trainers which typically isolate only the crushing grip pattern.
- Brazilian Jiu-Jitsu and grappling: Grip fighting in grappling arts requires sustained finger and forearm endurance at moderate intensities — exactly what repeater protocols on a hangboard train. Many BJJ athletes have adopted hangboard training as a supplementary tool for grip endurance alongside affordable grip trainers.
For non-climbers, the POWER GUIDANCE Wooden board (#4) or the Two Stones Pull-Up Ring board (#5) are the best entry points — they’re inexpensive, support basic dead hangs and pull-up variations, and don’t require climbing-specific knowledge to use safely. If you’re specifically interested in comparing hangboard training to other grip tools, our grip trainer vs fingerboard comparison covers the trade-offs in detail.
#1 — Best Overall Portable Hangboard

- Widest deck in portable category — proper shoulder-width training
- Most hold variety — 1/2/3/4-finger pockets + long edge
- R5 filleted edges — extremely skin-friendly for long sessions
- CNC single-block construction — no delamination risk
- Includes rope — ready to hang out of the box
- Best value per hold of any board in this guide
- Heavier than ultralight options (1.65 lbs vs 380g of La Baguette)
- No sloper holds — contact strength training not possible
- Width (19.6″) is slightly large for small chalk bags
- No labelled edge depths — requires measuring if tracking min-edge progression precisely
Bottom line: The best all-rounder in portable boards. Widest deck, most holds, best skin comfort. Buy this if you want to run real training sessions on the road, not just warm-up hangs.
#2 — Best for Slopers & Pinches

- Best slopers of any portable board — ball design is unmatched
- Unique double-pinch system trains 3 pinch widths
- Hollow urethane — lighter than appearance suggests
- Designed by Jason Kehl — elite climbing-specific engineering
- Grippy texture — excellent chalk uptake
- High durability — urethane outlasts wooden boards in humid/outdoor conditions
- No pockets — cannot train two-finger pocket protocols
- Most expensive board in this guide (~$100)
- Urethane is harder on skin than wood for high-volume sessions
- Better as supplement to a pocket board than a standalone portable
- Primarily wall-mount design — hanging portable use is secondary
Bottom line: Best sloper and pinch training in the portable category. Buy this if you boulder on compression terrain and need to train the specific grip types most portables ignore.
#3 — Best for Edge Training & Ultralight Travel

- Lightest board with real training variety (380g)
- Labelled edge depths — ideal for min-edge progression tracking
- Two tilt modes add training variety beyond a fixed board
- Thin profile — fits in chalk bag side pocket
- Recycled rubberwood — good sustainability credentials
- Top bar for warm-up jug hangs
- No pockets — edge-only training
- No slopers or pinch holds
- Narrower training variety than Two Stones #1 pick
- More expensive than Two Stones for fewer hold types
- 10mm edge requires conditioned tendons — not beginner-friendly
Bottom line: Best portable board for edge-specific protocols and ultralight travel. Buy this if you’re tracking minimum-edge progression and want the lightest possible pack footprint.
#4 — Best Budget Portable Hangboard

- Best price in this guide — excellent entry value
- Suspension training capability adds versatility
- Clean CNC wood construction, well-finished edges
- Compact and packable for travel
- Suitable for both beginners and intermediates
- Only 2 edge depths — limited training progression
- No pockets, slopers, or pinches
- Less hold variety than Two Stones #1 at a similar price point
- Better for warm-up than full training sessions
Bottom line: Best-value entry into portable hangboarding. Buy this if you’re new to travel training or need a budget crag warm-up board that also supports bodyweight suspension exercises.
#5 — Best for Beginners & Pull-Up Training

- Most beginner-friendly progression — jug to mono in one board
- Pull-up ring function adds exercise versatility
- Wrist rotation during pulls — more natural movement
- Lowest price in this guide (~$25–32 for pair)
- Sold as pair — both hands trained simultaneously
- CNC beechwood — durable and skin-friendly
- Ring shape limits some standard hangboard exercises
- No edge rail for half-crimp training
- Less suitable for structured repeater protocols
- Advanced climbers will outgrow the design fairly quickly
- Mono pocket training risks injury without years of conditioning
Bottom line: Best entry-level portable board. Buy this if you’re in the first year of climbing, want to combine pull-up and finger training, or need the lowest-cost portable option.
Complete Portable Hangboard Training Protocols
Buying the right portable hangboard is step one. Knowing how to use it effectively — and safely — is where the real gains happen. This section covers the four most effective hangboard training protocols, adapted specifically for the constraints of portable board training (limited hold variety, variable anchor quality, and the fact that you’re usually training between climbing days, not as a standalone activity).
Protocol 1: Max Hangs — Maximum Finger Strength
Max hangs are the gold standard protocol for building raw finger strength — the ability to hold a given edge with maximum force. The protocol is simple: hang from the smallest edge you can hold for 7–10 seconds at near-maximal effort, rest 3 minutes, and repeat. A typical session is 3–5 sets on one grip position, followed by 3–5 sets on a second grip position.
How to execute max hangs on a portable board:
- Choose your edge: On the Two Stones CJ-HB2055BX, use the shallowest edge you can hang for 10 seconds in a half-crimp with good form. On the La Baguette, start at 20mm and work toward 15mm and then 10mm as strength develops.
- Warm up thoroughly: 5–10 minutes of easy climbing or 3–4 progressive hangs on the deepest holds, starting at 40% effort and building to 80%. Never max hang cold. See our grip strength exercises guide for warm-up protocols.
- Hang for 7–10 seconds: Grip the edge in a strict half-crimp (fingers at 90 degrees). Hang with straight arms. Your shoulders should be engaged (not shrugged up to your ears) but not pulled down aggressively — this is a finger exercise, not a shoulder exercise.
- Rest 3 minutes between sets: This rest period is non-negotiable. Your phosphocreatine system needs 2–3 minutes to fully replenish. Cutting rest short reduces the quality of subsequent sets and increases injury risk.
- Add weight carefully: Once you can hang your target edge for 10 seconds across all sets with bodyweight, add 2.5–5 lbs using a weight belt or a loaded backpack. Progressive overload on a specific edge depth is the primary driver of max strength gains.
Protocol 2: Repeaters — Endurance and Hypertrophy
Repeaters are the most popular hangboard protocol for building finger endurance, forearm hypertrophy, and local muscular endurance. The format is 7 seconds on, 3 seconds off, repeated for a set duration (typically 6–7 repetitions per set, totalling 60–70 seconds of work). Rest 3 minutes between sets. A typical session is 3–5 sets across 2–3 grip positions.
Why repeaters work well on portable boards: Repeater protocols use moderate edge depths (typically 18–25mm) and moderate intensity (bodyweight or slight assistance). This means every board in this guide can support a full repeater session — even the minimal POWER GUIDANCE board with only two edge depths. The Two Stones CJ-HB2055BX is the best repeater board because its four pocket depths and long edge allow you to rotate through multiple grip positions within a single session.
Repeater session structure for the Two Stones CJ-HB2055BX:
- Warm-up: 2 sets of 7/3 repeaters on the deepest pocket, 50% effort
- Set 1 — Half-crimp edge: 7/3 × 7 reps on the long shallow edge (bodyweight)
- Set 2 — Open-hand deep pocket: 7/3 × 7 reps on the deepest 4-finger pocket
- Set 3 — Two-finger pocket: 7/3 × 5 reps on the medium 2-finger pocket (reduce reps due to higher intensity)
- Set 4 — Half-crimp edge (repeat): 7/3 × 7 reps, attempt to maintain form
- Cool-down: 2 minutes of gentle forearm stretching
Protocol 3: Minimum Edge — Progressive Overload on Small Edges
Minimum edge training involves hanging from the smallest edge you can hold for a fixed duration (typically 10 seconds) with bodyweight only. The goal is progressive reduction — over weeks and months, you reduce the edge depth while maintaining the same hang duration. This protocol specifically trains the neurological and structural adaptations that allow your fingers to generate force on smaller and smaller holds.
The YY Vertical La Baguette is the best portable board for minimum edge training because its six labelled edge depths (10–30mm) allow precise tracking. Record your minimum edge depth each session — the progress is measurable and motivating. A typical minimum edge progression for an intermediate climber might look like:
| Week | Target Edge | Sets × Duration | Rest Between Sets |
|---|---|---|---|
| 1–2 | 25mm | 4 × 10s | 3 min |
| 3–4 | 22mm | 4 × 10s | 3 min |
| 5–6 | 20mm | 4 × 10s | 3 min |
| 7–8 | 18mm | 4 × 10s | 3 min |
| 9–10 | 15mm | 3 × 10s | 3 min |
| 11–12 | 15mm (add 5 lbs) | 4 × 10s | 3 min |
Notice the pattern: reduce edge depth until you plateau, then add weight at the current depth before reducing further. This two-axis progression (smaller edges and heavier loads on current edges) produces the most robust long-term finger strength gains. For a complete grip training programme that incorporates hangboard work, see our beginner vs advanced grip strength guide.
Protocol 4: Density Hangs — Power Endurance
Density hangs involve accumulating maximum total hang time on a given edge within a fixed time block. The most common format: choose an edge you can hang for approximately 15–20 seconds, and accumulate as much hang time as possible in 10 minutes, resting as needed between hangs. Track total hang time and aim to increase it each session.
This protocol is excellent for climbers training for long sport routes or multi-pitch climbing where sustained forearm effort matters more than peak strength. Density hangs translate well to the demands of 30–60 meter pitches where you need to keep gripping despite accumulating pump. On a portable board, density hangs are ideal for rest-day training because they use moderate intensities that don’t overload recovering tendons.
Injury Prevention & Finger Tendon Science
Finger injuries are the most common and most debilitating injuries in climbing. Pulley ruptures, tendon strains, and collateral ligament sprains can sideline a climber for 3–12 months — and many of these injuries occur during or after hangboard training. Understanding the biology of your finger structures and training them with appropriate load management is the difference between years of progressive strength gains and a cycle of injury, rehab, and re-injury.
Your Finger Anatomy Under Load
Each finger is controlled by two flexor tendons — the flexor digitorum superficialis (FDS) which inserts at the middle phalanx, and the flexor digitorum profundus (FDP) which inserts at the fingertip. These tendons are held close to the bone by a series of annular pulleys (A1 through A5) and cruciform pulleys (C1 through C3). The pulleys function like the guides on a fishing rod — they keep the tendons tracking along the bone so the fingers can generate force efficiently.
When you hang from an edge, the A2 pulley (located at the base of the proximal phalanx) bears the highest load. In a half-crimp position, the A2 pulley experiences forces of approximately 2× body weight per finger. In a full crimp, this increases to approximately 3.5–4× body weight. This is why the A2 pulley is the most commonly injured structure in climbing — and why we recommend training primarily in half-crimp and open-hand positions rather than full crimp on hangboards.
Why Tendons Adapt Slowly
Tendons and pulleys are made primarily of Type I collagen, a structural protein that is synthesised and remodelled much more slowly than muscle tissue. While muscle can show measurable hypertrophy and strength gains within 4–6 weeks of training, tendons require 12–24 weeks of consistent, progressive loading to produce meaningful structural adaptation. This mismatch is the fundamental reason finger injuries happen: your muscles get strong enough to generate forces that your tendons and pulleys aren’t yet adapted to handle.
The practical implication for portable hangboard training: progress slower than you think you should. If you can hang a 20mm edge for 10 seconds today, don’t attempt 15mm next week. Spend 3–4 weeks at 20mm, adding time (10s to 12s) or adding small amounts of weight (2.5–5 lbs) before reducing edge depth. The strength gains you make at 20mm with added load translate directly to the smaller edge — but with tendons that have had time to adapt to the increased demand.
Common Hangboard Injuries and How to Avoid Them
- A2 pulley strain or rupture: The most common hangboard injury. Caused by sudden high loads, full-crimp training, or progressing too fast on small edges. Prevention: train in half-crimp, progress edge depth by no more than 2mm every 2–3 weeks, and avoid full-crimp on hangboards entirely. If you feel a sharp “pop” at the base of a finger during a hang, stop immediately — this is likely a partial or complete pulley tear that requires medical evaluation.
- Collateral ligament sprain: Occurs when fingers are loaded laterally — common on uneven pockets where one finger bears more load than the other. Prevention: use symmetric holds and avoid uneven pocket grips on a portable board. If a pocket feels like it’s loading one finger more than the others, move to a deeper hold.
- Flexor tendon strain: Gradual onset pain along the finger or palm, usually caused by excessive training volume or insufficient recovery. Prevention: follow the 48-hour rule — no more than one intense hangboard session every 48 hours, and limit total hang time per session. Beginners: no more than 5 minutes of total hang time. Intermediates: no more than 10–12 minutes.
- Elbow tendinopathy (climber’s elbow): Not a finger injury per se, but commonly triggered by hangboard training, particularly when adding weight to hangs. The wrist flexors and pronator teres are loaded heavily during all grip positions. Prevention: include antagonist training (wrist extensions, reverse curls) and resistance band rehab exercises as part of your warm-up or cool-down.
- Rule 1: Always warm up with 5–10 minutes of easy hangs before intense work
- Rule 2: Never max hang on edges smaller than 20mm if you’ve been climbing less than 18 months
- Rule 3: Progress edge depth by no more than 2mm per 2–3 week cycle
- Rule 4: Full crimp is for climbing, not for the hangboard — train half-crimp and open-hand
- Rule 5: 48 hours minimum between intense hangboard sessions
- Rule 6: If a hang causes sharp pain in a finger (not general burn), stop immediately
- Rule 7: Total hang time per session should not exceed 10 minutes for intermediates or 5 minutes for beginners
Recovery Protocols for Finger Training
Recovery between hangboard sessions is as important as the sessions themselves. Your tendons adapt during rest, not during training — training provides the stimulus, but the actual structural remodelling happens in the 48–72 hours after a session. To optimise recovery:
- Sleep: 7–9 hours per night. Collagen synthesis peaks during sleep. This is the single most important recovery variable.
- Nutrition: Adequate protein intake (0.7–1.0g per lb of body weight) supports tendon repair. Some research suggests vitamin C supplementation (250–500mg) taken 30–60 minutes before training may enhance collagen synthesis — though the evidence is still emerging.
- Active recovery: Light climbing at 50–60% intensity on rest days promotes blood flow to the tendons without creating damaging loads. Alternatively, gentle forearm massage and finger extensions with a grip trainer in the extensor position help balance the forearm musculature.
- Cold exposure: Some climbers use ice baths or cold plunge protocols after intense training to manage inflammation. While the evidence for cold therapy specifically improving tendon recovery is limited, it can reduce perceived soreness and may be useful during high-volume training phases. Our cold plunge protocol guide covers the recommended temperatures and durations.
Common Portable Hangboard Mistakes (and How to Fix Them)
We see the same errors repeated constantly by climbers new to portable hangboard training. Here are the most common mistakes and their corrections:
- Mistake: Skipping warm-up and going straight to working intensity. Fix: Always perform 5–10 minutes of low-intensity hangs on the largest holds before moving to your working edge. Start at 40% of max effort and increase by 10–15% per set until you reach working intensity.
- Mistake: Training the same grip position every session. Fix: Rotate grip positions between sessions. If you did half-crimp max hangs today, do open-hand repeaters next session. This distributes load across different tendon pathways and prevents repetitive stress on the same structures.
- Mistake: Adding weight too quickly. Fix: Progress by edge depth first, weight second. Only add weight after you can comfortably hang your target edge for the prescribed duration across all sets. Add no more than 2.5–5 lbs per cycle (2–3 weeks). Using a proper weightlifting belt for weighted hangs distributes load through the hips rather than pulling on your arms.
- Mistake: Using a portable board for full training while also climbing 4+ days per week. Fix: On climbing trips or during high-volume climbing weeks, use the portable board for warm-up only. Save genuine training sessions (max hangs, repeaters) for rest days or periods when you’re not climbing. Finger tendon capacity is a finite resource — you can’t add training volume on top of maximum climbing volume without consequences.
- Mistake: Not tracking progress. Fix: Keep a simple log — edge depth, hang duration, number of sets, and any added weight. On the La Baguette with labelled edges, this is trivially easy. On other boards, measure the edge depths with callipers once and record them. Without data, you can’t manage progression or identify plateaus.
- Mistake: Anchoring to an unreliable point. Fix: Always test your anchor before committing to a hang. Apply progressive load — push down with your hands first, then load one foot, then both feet, then hang with bent arms before straightening. If anything flexes, shifts, or makes concerning sounds, find a different anchor. This is especially important at outdoor crags where you might hang from a tree branch or bolt hanger.
Skin Care & Taping for Frequent Hangboard Users
If you use a portable hangboard multiple times per week, your finger skin takes a beating — particularly on edges and in pockets where the friction loads are concentrated. Skin management is an overlooked component of consistent training: if your skin is too damaged to hang, you miss sessions, and missing sessions breaks progression. Here’s how to keep your skin in training condition:
- Sand, don’t peel: After sessions that produce calluses or flappers, use 150–220 grit sandpaper or a dedicated climbing sanding block to smooth calluses flush with surrounding skin. Never peel or cut calluses — this creates open wounds and uneven surfaces that catch on holds during your next session.
- Moisturise between sessions: Apply a thin layer of climbing-specific hand balm (or unscented moisturiser) before bed on training rest days. This keeps skin pliable and accelerates healing. Avoid moisturising immediately before a session — you want dry, firm skin for training.
- Use athletic tape for hot spots: If a specific pocket or edge consistently creates a hot spot on a finger, pre-tape it with a strip of 1-inch athletic tape before your session. The H-tape method (two loops around the finger with a cross-strip) provides the best protection for the A2 pulley area without reducing grip quality significantly.
- Manage humidity: If you’re training in a humid environment (tropical crags, van life in summer), wipe the board and your hands with a towel between sets. Excess moisture softens skin and increases tear risk on wooden boards. A small chalk ball in your pack handles this — keep one specifically for portable board sessions.
For climbers who also struggle with excessive hand sweat, combining liquid chalk with a portable wood board is the most effective approach. Apply liquid chalk before your first set, then supplement with loose chalk as needed. The liquid base penetrates the wood grain and provides a longer-lasting dry surface than loose chalk alone.
Side-by-Side Comparison Table
| Board | Weight | Hold Types | Best Grip Training | Skill Level | Price | Best For |
|---|---|---|---|---|---|---|
| 🏆 Two Stones CJ-HB2055BX | 1.65 lbs | Pockets (4 depths) + Long Edge | Half-crimp, Open-hand, Pockets | Beg → Adv | ~$28–35 | Full sessions on the road |
| 🔵 So iLL Iron Palm | Light (hollow) | 4 Edges + 2 Slopers + 2 Pinches | Slopers, Pinches, Edges | Int → Elite | ~$95–110 | Compression bouldering training |
| ⚡ YY Vertical La Baguette | 380g (0.84 lbs) | 6 Edges (10–30mm) + Top Bar | Half-crimp, Open-hand, Rail | Int → Adv | ~$40–55 | Edge protocols, ultralight travel |
| 💰 POWER GUIDANCE Wooden | Light | 2 Edges | Half-crimp, Open-hand | Beg → Int | ~$35–45 | Budget warm-up, crag training |
| 🌱 Two Stones Ring Board | 580g (pair) | 5 Pocket Depths (Jug → Mono) | Pockets, Pull-ups, Wrist rotation | Beginner | ~$25–32 | Beginners, combined pull training |
Category Rankings at a Glance
CJ-HB2055
Iron Palm
Baguette
Guidance
Two Stones
Which One Should You Buy?
- Most climbers — buy the Two Stones CJ-HB2055BX. Best hold variety, best value, best skin comfort, works for beginners through advanced. The correct default choice.
- Boulderers on compression routes — add the So iLL Iron Palm. The sloper and pinch training it provides is unavailable on any other portable board. Buy alongside #1, not instead of it.
- Sport climbers running structured edge protocols — buy the YY Vertical La Baguette. Labelled depths and tilt modes make it the best portable board for climbers tracking min-edge progression precisely. Choose this over #1 if edge training is your primary goal.
- Budget-limited or casual — buy the POWER GUIDANCE Wooden. Covers the basics well for crag warm-ups and light travel sessions at the lowest price.
- Beginners (under 18 months climbing) — buy the Two Stones Ring Board. The jug-to-pocket progression is the safest and most gradual entry point, and the pull-up ring function adds exercise variety while your tendons are still developing tolerance.
- Van life / big wall climbers — pair #1 + #3. The Two Stones for pocket and open-hand variety, the La Baguette as a backup ultralight edge board that genuinely fits in a chalk bag. Combined weight under 1kg.
Frequently Asked Questions
Hangboard Training for Older Climbers (40+)
Climbing is a lifelong sport — and an increasing number of climbers in their 40s, 50s, and 60s are discovering that structured finger training is not just safe at their age, but one of the most effective tools for maintaining climbing performance as tendon elasticity and recovery capacity change. If you’re an older climber considering a portable hangboard, this section covers the specific adaptations you need to make to training protocols.
Why Finger Training Becomes More Important With Age
Starting around age 35–40, several physiological changes affect climbing performance. Tendon collagen cross-linking increases, making tendons stiffer but potentially more brittle. Muscle recovery between sessions takes longer — 72 hours instead of 48 hours for peak recovery in many older athletes. Connective tissue blood flow decreases, slowing the delivery of nutrients and removal of metabolic waste from tendons and pulleys.
Paradoxically, these changes make structured finger training more valuable, not less. Controlled, progressive loading on a hangboard provides the precise stimulus needed to maintain tendon health and prevent the deconditioning that leads to injury when older climbers attempt moves their tendons are no longer adapted for. The key difference from younger athletes is load management — older climbers need more conservative progression, longer recovery periods, and stricter adherence to warm-up protocols.
Adapted Protocols for Climbers Over 40
- Extend recovery to 72 hours between intense hangboard sessions (not 48 hours). One intense session per week is sufficient — supplement with easy warm-up hangs only on other days.
- Use repeaters over max hangs as your primary protocol. Repeaters use moderate intensity and higher volume, which provides a better stimulus-to-risk ratio for stiffer tendons. Save max hangs for blocks where you specifically need peak strength — and limit them to 3–4 week blocks with 1–2 weeks of lower-intensity work between.
- Warm up for 10–15 minutes, not 5. Older tendons need more progressive loading before they’re ready for working intensity. Start with finger extensions and light forearm massage, then 5–6 progressive sets from 40% to 85% effort before your working sets.
- Don’t chase minimum edges below 20mm unless you have a specific performance goal that requires it. The injury risk of training on 14–16mm edges outweighs the marginal performance benefit for most recreational climbers over 40. Focus on strength gains at 20–25mm instead.
- Add antagonist training. Finger flexor strength without corresponding extensor strength creates muscle imbalances that accelerate elbow tendinopathy. Use a resistance band for finger and wrist extensions 2–3 times per week.
- Consider a slant board for ankle and lower body warm-up before hangboard sessions — full-body warm-up improves systemic circulation, which benefits tendon blood flow during finger training.
Best Portable Boards for Older Climbers
The Two Stones CJ-HB2055BX remains the top recommendation for older climbers — its R5-filleted edges are the most skin-and-tendon-friendly in this guide, and the deep pocket options allow conservative loading while still providing meaningful training stimulus. Avoid the La Baguette’s 10mm edge unless you have multiple years of structured hangboard training behind you. If you’re new to hangboarding at 40+, start with the Two Stones Ring Board (#5) — the jug-to-shallow-pocket progression is the gentlest possible entry point for conditioned tendons that haven’t been specifically loaded before.
Periodization: Integrating Portable Board Training Into Your Climbing Season
A portable hangboard is a tool — and like any training tool, it’s most effective when used within a structured plan rather than randomly. Periodisation is the practice of cycling between different training emphases over weeks and months to produce peak performance at specific times. For climbers, this means aligning hangboard training intensity with your climbing season so that finger strength peaks when you need it most — whether that’s a trip to the Red River Gorge, a competition season, or a project window at your local crag.
Base Phase (Off-Season / 8–12 Weeks Before Goal)
During the base phase, your climbing volume is typically lower and you have the most recovery capacity to dedicate to structured finger training. This is the time for your most intense portable hangboard work — max hangs, minimum edge protocols, and the highest training loads you’ll use all year.
Base phase portable board protocol:
- 2 hangboard sessions per week (e.g., Monday and Thursday)
- Session 1: Max hangs — 4–5 sets on half-crimp edge, 3 sets on open-hand pocket. 3 minutes rest between sets.
- Session 2: Minimum edge — 4–5 sets of 10-second hangs on the smallest manageable edge. 3 minutes rest between sets.
- Climbing 2–3 other days at moderate intensity — focus on volume and technique, not limit bouldering.
- Progress edge depth or added weight by 2–5% every 2 weeks.
Performance Phase (Season / 4–8 Weeks Before Goal)
During your performance phase, climbing intensity and specificity increase — you’re projecting hard routes, limit bouldering, and climbing at your highest level. Hangboard training should decrease in volume but maintain intensity to preserve the finger strength you built during the base phase without adding fatigue that interferes with climbing performance.
Performance phase portable board protocol:
- 1 hangboard session per week (on a rest day mid-climbing-week)
- Max hangs only — 3–4 sets on half-crimp edge at your base-phase working intensity. Do not progress; maintain.
- Use the portable board for warm-ups before every climbing session (5 minutes, progressive loads on large holds).
- Total weekly hang time: 5–8 minutes maximum (not counting warm-ups).
Transition / Recovery Phase (Post-Goal / 2–4 Weeks)
After a goal trip or competition, take 2–4 weeks of reduced training to allow accumulated fatigue to dissipate and connective tissue to fully recover. During this phase, use the portable board for maintenance only — easy repeaters at 60% intensity, warm-up hangs, and no progressive overload. This is also a good time to address any nagging finger tweaks with gentle loading that promotes healing without re-injury.
- Weeks 1–12 (Base): 2× hangboard sessions/week — max hangs + min edge. Progress aggressively.
- Weeks 13–14 (Pre-Performance): 1× hangboard session/week — taper volume by 40%. Maintain intensity.
- Weeks 15–22 (Performance): 1× hangboard session/week — maintain only. Focus on climbing.
- Weeks 23–26 (Recovery): Easy maintenance hangs only. No progressive overload. Address injuries.
- Repeat cycle. Two full cycles per year produces the best long-term strength gains for most climbers.
Combining Portable Board Training with Other Fitness Work
Finger training doesn’t exist in isolation — your overall fitness programme affects recovery capacity, injury risk, and climbing performance. Here’s how to integrate a portable hangboard into a broader training week that includes other fitness modalities:
- Strength training: Deadlifts and pull-ups both load the grip system heavily. Schedule heavy pulling days at least 48 hours away from intense hangboard sessions to avoid cumulative grip fatigue. If you use lifting straps for deadlifts, this becomes less of a concern — straps offload the grip during pulling work and preserve finger capacity for hangboard sessions.
- Cardio and conditioning: Running, cycling, and rowing don’t significantly impact finger recovery. Battle ropes and battle rope HIIT workouts do load the grip — schedule these at least 24 hours away from hangboard work.
- Mobility and flexibility: Slant board exercises, balance board training, and general flexibility work are compatible with any hangboard schedule. They don’t load the fingers and can be done on the same day as hangboard sessions as part of a warm-up or cool-down.
- Recovery days: Use muscle stimulators on forearm flexors for active recovery between sessions. Pair with resistance bands for antagonist extensor work to prevent muscle imbalances.
Weighted Hang Protocols on Portable Boards
Once you’ve built a foundation of bodyweight hangboard strength, adding external load to your hangs is the primary method for continued strength progression. Weighted hangs are especially important for intermediate and advanced climbers who can comfortably hang their working edge with bodyweight and need the additional stimulus to continue developing.
How to add weight to a portable hang: The safest method is a dip belt or climbing harness with a sling, hung from a carabiner clipped to your anchor rope below the board. Add weight in the smallest increments available — 2.5 lb plates are ideal, though many gyms only have 5 lb minimums. A loaded backpack works as a substitute when you don’t have plates available — use water bottles or books to approximate the desired load. Avoid holding dumbbells between your feet or knees — this changes your body position and creates inconsistent loading between hands.
Weight progression guidelines: Add weight only when you can complete all prescribed sets at your current load with good form. Increase by 2.5–5 lbs per 2–3 week cycle. If you cannot complete a set with good form after a weight increase, return to the previous load for one more cycle before attempting again. Most intermediate climbers will plateau at approximately bodyweight + 30–50 lbs on a 20mm edge before needing to shift focus to smaller edges rather than heavier loads. Advanced climbers targeting specific outdoor goals may add up to bodyweight + 70–80 lbs, but this requires years of progressive training and meticulous injury prevention.
Always verify that your portable board’s weight rating supports your body weight plus added load. The Two Stones CJ-HB2055BX is rated to 400 lbs — sufficient for a 180 lb climber adding up to 220 lbs of external load, which exceeds any practical training scenario. Check the anchor’s rating as well — a bolt hanger or gym pull-up bar is typically rated to 300+ lbs, but a tree branch or door frame may have lower limits.
Portable Hangboard Maintenance & Care
A quality portable hangboard will last years with minimal care — but a few simple maintenance practices will keep it in optimal training condition and extend its lifespan significantly:
- Wood boards — sand periodically: Over time, chalk accumulates in the wood grain and the surface becomes glazed and less grippy. Every 2–3 months of regular use, lightly sand the hold surfaces with 180–220 grit sandpaper. This removes the chalk buildup and exposes fresh wood grain. Don’t sand aggressively — you’ll change the edge depth. A few light passes are sufficient.
- Wood boards — avoid prolonged moisture exposure: If your board gets wet (rain at the crag, condensation in a pack), dry it at room temperature — not in direct sunlight or near a heat source, which can cause warping. Store in a breathable bag, not sealed in plastic where moisture gets trapped.
- Rope inspection: If your board uses a rope or sling for hanging (most portable boards do), inspect the rope before each session for signs of abrasion, fraying, or chemical damage. Replace climbing rope every 12–24 months of regular use, or immediately if you notice any damage. A 6mm nylon cord costs under $5 — it’s the cheapest safety item in your training setup.
- Urethane boards — clean with water: The So iLL Iron Palm and other urethane boards can be cleaned with a damp cloth and mild soap. Urethane doesn’t absorb chalk the way wood does, but surface buildup can reduce friction. A quick wipe-down every few weeks keeps the texture consistent.
- Storage: Store your portable board in a dedicated dry bag or stuff sack inside your climbing pack. This protects the edges from damage during transport and prevents chalk dust from coating everything else in your pack. Several climbing brands make purpose-built hangboard bags, though a simple drawstring bag works fine.
Combining Hangboard Training with Resistance Bands
Resistance bands are the perfect companion tool for a portable hangboard — they’re even lighter, pack even smaller, and fill the training gaps that a hangboard alone cannot address. Here’s how to combine both tools for a more complete portable training system:
- Antagonist training: Wrap a loop band around your fingers and extend them against the resistance. This trains the finger extensor muscles that oppose the flexors trained by the hangboard. Balanced extensor/flexor strength reduces injury risk and improves grip endurance. 3 sets of 15–20 reps before or after your hangboard session.
- Rotator cuff and shoulder prehab: Band pull-aparts, external rotations, and face pulls prepare the shoulders for the overhead loading of hangs. These exercises require almost no space and can be done in a hotel room or at the crag. See our resistance bands for physical therapy guide for specific exercise prescriptions.
- Wrist conditioning: Wrist curls and reverse wrist curls with a band strengthen the forearm muscles that stabilize the wrist during hangs. A strong, stable wrist reduces the compensatory load on finger tendons — meaning your fingers can do their job more efficiently.
- Progressive warm-up: Band-resisted finger curls at light resistance are an excellent warm-up tool before hangboard sessions, particularly in cold environments where a gradual warm-up is essential for tendon safety. 2 sets of 20 reps with a light band takes 2 minutes and significantly improves tendon readiness.
For a complete portable training kit, pair any board from this guide with a set of resistance bands. A medium and heavy band adds minimal weight and covers all the supplementary exercises listed above. Some climbers also add a crusher or spring grip trainer for crushing-grip work that the hangboard doesn’t provide.
DIY Portable Hangboard: Building Your Own
For the woodworker-inclined climber, building a portable hangboard from scratch is a rewarding project that can be customised to your exact training needs. Here’s a practical guide to the most common DIY approach:
Materials needed:
- A piece of hardwood — maple, birch, or oak. Minimum dimensions: 18″ wide × 4″ tall × 1.5″ thick. A wider board (20″+) is preferable for shoulder-width training. Avoid softwoods (pine, cedar) — they dent under finger pressure.
- 6mm climbing cord or accessory cord — 3 meters (10 feet). Available at any climbing shop for $3–5.
- Sandpaper — 120, 180, and 220 grit.
- A router or chisel for shaping edges (optional but recommended).
- A drill with a 10mm bit for rope holes.
Build process:
- Mark your holds: Along the bottom edge, mark a 20mm-deep rail that runs the full width — this is your primary half-crimp and open-hand edge. Along the top, mark two pocket shapes (one 4-finger at 30mm deep, one 2-finger at 20mm deep) spaced evenly apart.
- Shape the edges: Use a router, chisel, or hand saw and file to create your pocket and edge profiles. Take your time — uneven edges load each hand differently, which creates injury risk. Sand all shaped surfaces through 120 → 180 → 220 grit progression.
- Fillet all edges: Round every edge with sandpaper until there are no sharp corners anywhere your fingers will contact. Target an R3–R5 fillet radius — the edge should feel comfortable when you press a fingertip into it without a pressure point.
- Drill rope holes: Drill two 10mm holes, one near each end of the board, centred 1 inch from the top. Thread your 6mm cord through both holes and tie a secure knot (figure-eight on a bight) on each end. Leave enough rope to create a hanging loop above the board of approximately 12–18 inches.
- Final sanding and finish: Light final sand with 220 grit on all contact surfaces. Do not apply varnish, lacquer, or oil — the natural wood surface provides the best chalk grip. A light coat of linseed oil on non-contact surfaces (back and sides) is acceptable for moisture resistance, but avoid any finish on the training surfaces.
Total cost: $15–25 (lumber + cord + sandpaper). Total build time: 2–4 hours depending on tools and experience. The result is a functional, customised board — though with less edge precision than a CNC-milled commercial board. For most climbers, the $28–35 Two Stones CJ-HB2055BX is a better value when you factor in time cost, but a DIY build is satisfying and can be tailored to specific training needs that no single commercial board addresses. If you want to complement a DIY board with other grip tools, check our guide to top grip trainers under $30.
HOME WALL GUIDE
Ready to build a permanent setup? The complete home wall hangboard guide.
Read the Guide →